ESP32-FPV-Camera介绍和使用
1. 编译目标2. 编译步骤Step 1 软件配置环境准备Step 2 获取开源代码Step 3 2.4G WiFi频段选择Step 4 要确保2.4G WiFi网卡处于Monitor状态Step 5 修改频点相关代码Step 6 修改WiFi网卡相关代码Step 7 OpenGL 版本问题Step 8 构建天空端Step 9 构建地面端 3. OV5640/OV2640规格及实测4. OV2640与模拟FPV摄像头对比5. 参考资料ESP32是一款高性价比的嵌入式芯片,且其ESP-IDF工具采用了CMake的Unix Style开发方式,也是笔者比较喜欢的一种工程组织方式。IDE工具对于应用开发带来了便捷性,屏蔽了很多系统,模块,组件,开源(非开源)的底层细节。尤其是IDE工具经常升级,导致很多由于工具升级带来的各种问题(有的时候感觉莫名其妙),但是Makefile/CMake等成熟的嵌入工程组织方式更加稳定、可靠。
1. 编译目标
规格如下:
ESP-32S模组2MB 外部PSRAM4MB SPI FlashSD Card摄像头:OV2640配套底板(支持自动烧录,否则需要跳线支持)
2. 编译步骤
Step 1 软件配置环境准备
这里基于Ubuntu准备相关的软件配置环境。
$ sudo apt-get update$ sudo apt-get install git$ sudo apt-get install gitk git-gui
$ uname -aLinux daniel-ThinkPad-SL410 5.15.0-58-generic #64~20.04.1-Ubuntu SMP Fri Jan 6 16:42:31 UTC x86_64 x86_64 x86_64 GNU/Linux$ lsb_release -aNo LSB modules are available.Distributor ID: UbuntuDescription: Ubuntu 20.04.5 LTSRelease: 20.04Codename: focal
Step 2 获取开源代码
$ git clone git@:jeanlemotan/esp32-cam-fpv.gitCloning into 'esp32-cam-fpv'...remote: Enumerating objects: 324, done.remote: Counting objects: 100% (81/81), done.remote: Compressing objects: 100% (46/46), done.remote: Total 324 (delta 48), reused 49 (delta 32), pack-reused 243Receiving objects: 100% (324/324), 927.22 KiB | 856.00 KiB/s, done.Resolving deltas: 100% (126/126), done.$ cd esp32-cam-fpv/$ git log -n 1commit adc1e5c040bada4780de0db60716af411d326435 (HEAD -> main, origin/main, origin/HEAD)Merge: 66ae72a c97be43Author: jeanlemotan <10252034+jeanlemotan@users.>Date: Mon Feb 20 21:49:40 +0100Merge pull request #32 from JulesThuillier/mainFix typo in gs Makefile for Raspberry Pi check$ git branch -a* mainremotes/origin/HEAD -> origin/mainremotes/origin/main
Step 3 2.4G WiFi频段选择
实际环境,尤其是2.4G频段有大量的WiFi路由器信号;ESP32-FPV-Camera代码目前是写死的;寻找一个相对没有被占用的频段,将大大降低干扰,从而减少丢包;注:这里建议大家可以选择下载CELLULAR-Z软件,对WiFi信号进行扫描。
从以上扫描ssid热点信号看,4频段相对来说会受到较少干扰。
注:这里扫描到的是标准的WiFi热点信号,其他非标准干扰信号是无法扫描到的。因此如果仍然存在干扰问题,建议去暗室或更换测试时间或更换测试地点。
Step 4 要确保2.4G WiFi网卡处于Monitor状态
详见:WiFi monitor模式的配置和运行检查(Ubuntu系统)
建议:购买8812AU芯片网卡,并安装对应的kms驱动。
Step 5 修改频点相关代码
天空端:esp32-cam-fpv\air_firmware\main\main.cpp
地面端:esp32-cam-fpv\gs\src\main.cpp
Step 6 修改WiFi网卡相关代码
笔记本自带一张网卡,笔者又自行购买了两块8812AU网卡(因为Monitor模式下带宽通常不高,多块网卡,分开方式可以减少丢包概率)
wlp5s0:笔记本无线网卡wlx200db032da3a:8812AU网卡1wlx0c9160035b62:8812AU网卡2
地面端:esp32-cam-fpv\gs\src\main.cpp
Step 7 OpenGL 版本问题
ESP32-FPV-Camera作者jeanlemotan是在Pi 4上做的地面端。不过经过大家的努力,目前已经可以在笔记本电脑上进行地面端程序的运行。
注:这里有一些细节需要关注的就是OpenGL的版本问题。
$ glxinfo|grep versionserver glx version string: 1.4client glx version string: 1.4GLX version: 1.4Max core profile version: 3.3Max compat profile version: 3.0Max GLES1 profile version: 1.1Max GLES[23] profile version: 3.0OpenGL core profile version string: 3.3 (Core Profile) Mesa 21.2.6OpenGL core profile shading language version string: 3.30OpenGL version string: 3.0 Mesa 21.2.6OpenGL shading language version string: 1.30OpenGL ES profile version string: OpenGL ES 3.0 Mesa 21.2.6OpenGL ES profile shading language version string: OpenGL ES GLSL ES 3.00
地面端:esp32-cam-fpv\gs\src\imgui_impl_opengl3.cpp
Step 8 构建天空端
当前天空端采用ESP-IDF v4.4.4,IDF安装,详见ESP32开发指南。
ESP32 SDK环境设置:
$ cd esp-sdk/esp-idf-v4.4.4/$ . ./export.shSetting IDF_PATH to '/home/daniel/Work/esp-sdk/esp-idf-v4.4.4'Detecting the Python interpreterChecking "python" ...Python 3.8.10"python" has been detectedAdding ESP-IDF tools to PATH...Not using an unsupported version of tool openocd-esp32 found in PATH: 0.10.0.Using Python interpreter in /home/daniel/.espressif/python_env/idf4.4_py3.8_env/bin/pythonChecking if Python packages are up to date...Python requirements from /home/daniel/Work/esp-sdk/esp-idf-v4.4.4/requirements.txt are satisfied.Added the following directories to PATH:/home/daniel/Work/esp-sdk/esp-idf-v4.4.4/components/esptool_py/esptool/home/daniel/Work/esp-sdk/esp-idf-v4.4.4/components/espcoredump/home/daniel/Work/esp-sdk/esp-idf-v4.4.4/components/partition_table/home/daniel/Work/esp-sdk/esp-idf-v4.4.4/components/app_update/home/daniel/.espressif/tools/xtensa-esp-elf-gdb/11.2_0823/xtensa-esp-elf-gdb/bin/home/daniel/.espressif/tools/riscv32-esp-elf-gdb/11.2_0823/riscv32-esp-elf-gdb/bin/home/daniel/.espressif/tools/xtensa-esp32-elf/esp-r2-patch5-8.4.0/xtensa-esp32-elf/bin/home/daniel/.espressif/tools/xtensa-esp32s2-elf/esp-r2-patch5-8.4.0/xtensa-esp32s2-elf/bin/home/daniel/.espressif/tools/xtensa-esp32s3-elf/esp-r2-patch5-8.4.0/xtensa-esp32s3-elf/bin/home/daniel/.espressif/tools/riscv32-esp-elf/esp-r2-patch5-8.4.0/riscv32-esp-elf/bin/home/daniel/.espressif/tools/esp32ulp-elf/2.35_0830/esp32ulp-elf/bin/home/daniel/.espressif/tools/openocd-esp32/v0.11.0-esp32-1026/openocd-esp32/bin/home/daniel/.espressif/python_env/idf4.4_py3.8_env/bin/home/daniel/Work/esp-sdk/esp-idf-v4.4.4/toolsDone! You can now compile ESP-IDF projects.Go to the project directory and run:idf.py build
编译天空端固件:
$ cd esp32-cam-fpv/air_firmware/$ idf.py build$ idf.py -p /dev/ttyUSB0 flash$ idf.py -p /dev/ttyUSB0 monitor
Step 9 构建地面端
$ cd esp32-cam-fpv/gs/$ make
3. OV5640/OV2640规格及实测
从规格的角度看OV5640胜出,但是实测情况貌似OV5640并不理想。
ESP32-FPV-Camera FPS Test
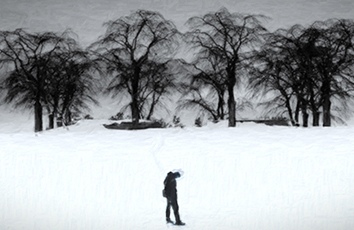
4. OV2640与模拟FPV摄像头对比
这里采用对比近距离测试:
无牙仔2模拟摄像头 + 熊猫图传 + 肥鲨眼镜ESP32-FPV-Camera(OV2640 + 外置ipx 3dbi猪尾巴天线) + 笔记本电脑(8812AU网卡 x 2 + 笔记本网卡)
存在以下几个问题:
无牙仔2是鱼眼镜头,整体视角宽(变形)晃动时,因为视场范围小,因此整体看ESP32场景变化大FOXEER Micro无牙崽2 1200TVL m12 1.7镜头 整体规格高于ESP32-FPV-Camera(800 x 600)外接ipx天线座电阻焊接处理存在问题(可能影响信号),且该模块没有RF信号放大增加分辨率会导致jpeg传输数据量的增加,需要更高的带宽OV2640 SVGA(800 x 600)上限是 30 fps
ESP32-FPV-Camera与模拟摄像头简单对比
5. 参考资料
【1】WiFi monitor模式的配置和运行检查(Ubuntu系统)
【2】ESP32-Camera性能(简单)测试评估